Behind the Scenes - The Toll
"The Toll" was my graduation film for the bachelor of animation program at Queensland College of Art. It took nearly 2 years to get it from idea to the screen. So let me take you back to early 2015 where it all began *harp strum*.
So I was taking a script writing course and we had to write a script (weird I know). I liked the isolated tollbooth as a setting but I didn't know what to do with it. I needed a problem. So I asked myself; what would I do if I was a tollbooth operator, alone in the middle of nowhere? I would play with the gates. And that's when I had my "eureka moment"; what if he broke the gates? Then nobody can get through. Houston we have a premise.

one of the later drafts
The first draft was incredibly ambitious. The final film used about a third of the original script. There were tons of additional characters. I wanted characters to just keep rolling in one after the other so that by the end there was an interesting community of people with Basil right at the centre of it all. However, from a production standpoint, I didn't have the budget or the time to pull it off. It was looking like a 20 minute film.
Second half of 2015 was spent working on storyboards. Not much to talk about. Here's the opener of basil eating birthday cake in the storeroom which ended up being cut.

Storyboard of deleted opening scene
So the project was greenlit for production at the end of 2015. This meant I could start making things. I thought I would start with Basil's maquette.

Basil Maquette
main set progress pictures
There are always so many things to think about when building a set for stop motion. What are you going to make it out of? How big is it? how does it come apart if you need to move it? Can the animator (me) get to the puppet comfortably? How long do I have to make it?.... All these things. One problem in particular was accessing Basil when he's inside the booth. We ended up making the whole thing detachable from the set and it could break into two pieces if necessary. Then you could animate Basil easily and then put the booth back in exactly the same position using the cleverness of magnets.

1. booth separated into two pieces 2. unpainted booth 3. final booth
3D printing is such a welcomed tool for me when time is of the essence. lots of things were 3D printed: the bin lid, the poles for the guard rails, the fan, the traffic cones, the steering wheel, the tyres. It's amazing what you can do with a desktop 3D printer.

1. 3D printed fan 2. 3D printed traffic cone 3. 3D printed pole guards (don't know what they're called)
The main 3D printing triumph was the replacement mouths. Basil and Sage's faces were modeled and rigged in maya and then posed into various mouth and brow shapes. These were printed, cleaned and painted ready to snap on and off of their respective heads. Time for some stats; 83 replacement pieces were printed for the film, around 12 of these are used to simulate basic speech. Just one of Basil's mouths takes half an hour to print and uses just 3.8g of filament.

1. unpainted face 2. finished faces 3. maquette vs 3D model
Behind the Scenes - Elevator Madness
This project was a uni assignment for the "Alternative Animation Course" at Griffith University. The brief was to make a 60 second film incorporating some sort of characterisation.
My idea was a little unusual, It was essentially a guy in an elevator doing absolutely "nothing". I wanted to see if I could hold an audience's attention for 60 seconds with only that. It was very tempting to add a storyline, but I knew if I did, then it would no longer be about "nothing".

Elevator Madness - Still
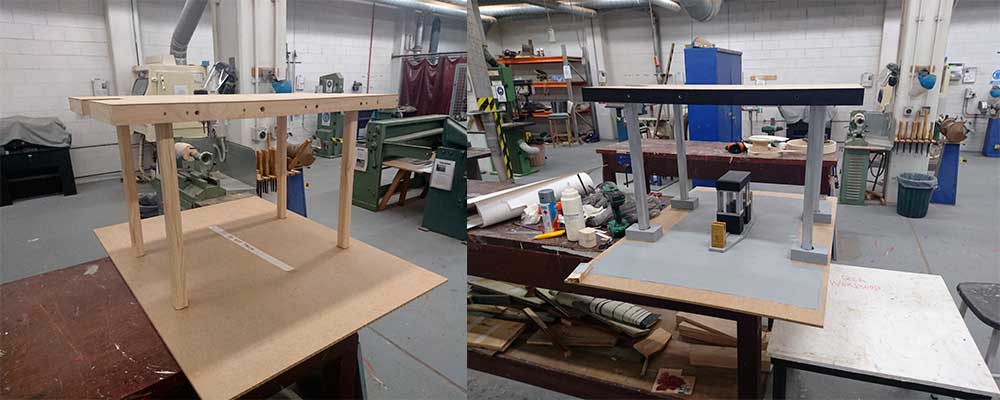
I had about 3 weeks to pull this one off. I started with the set using MDF for the side walls and foam board for the front and back walls which are removable. The handrails are 3D printed, the floor is felt and the wall panels are foam board with a textured card glued to the front.

1. finished set and character 2. 3D printed railings 3. finished painted railings, ready to be glued
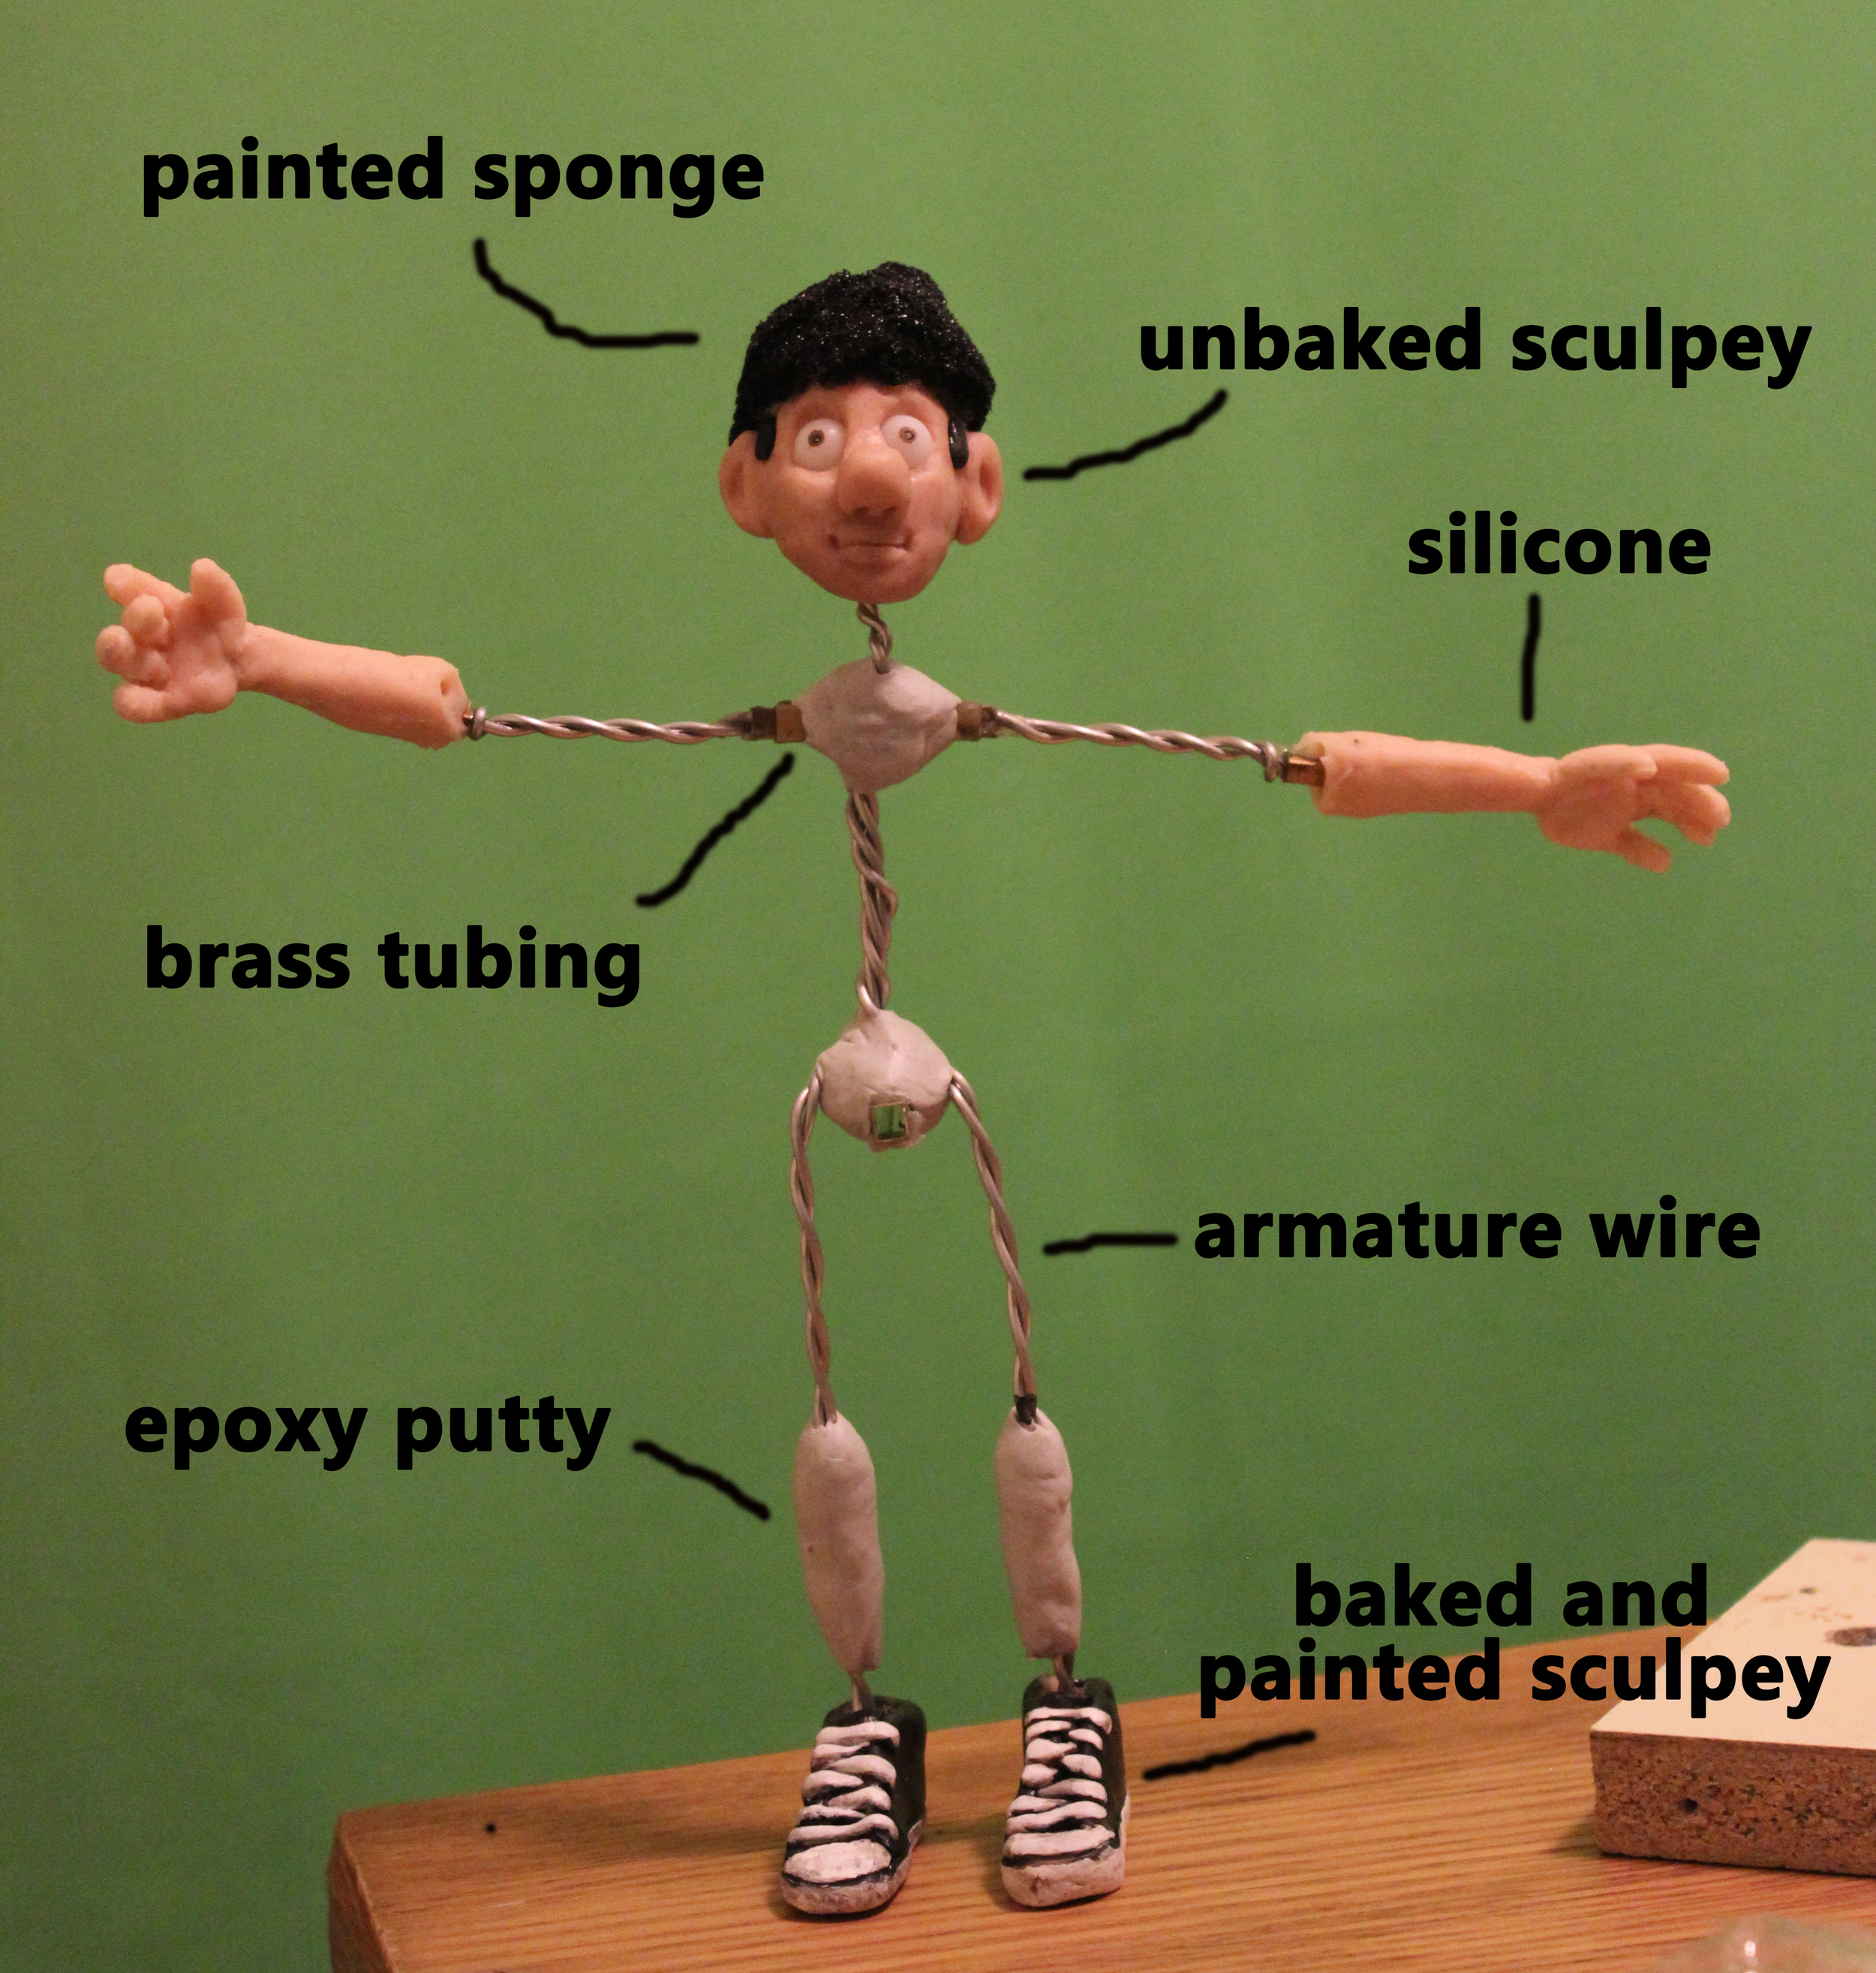
For the character, I reused the armature from "Bush Turkeys of QCA" and made new silicone hands from scratch. For the head I made the back and ears out of sculpey, baked it, and then built up the rest of the face so I can hold on to the ears without them squishing.

1. hand mould (hydrocal 105) 2. head 3. sculpted hands
For a while I've wondered how to glue things to fabric (like the buttons) without leaving "glue stains" if you will. After searching around on other blogs I noticed two words, "Contact Adhesive", and life has never been the same since. It worked exactly how I needed it to.

Contact Adhesive
I thought that I would use a lot of hot glue for this project but in the end I used PVA for wood, super glue for things like 3D printed parts, double sided tape for sticking paper to the panels, blu tack to hold his hat in place, contact adhesive for the buttons and absolutely no hot glue. Which is a shame because I bought heaps of it thinking that I would.
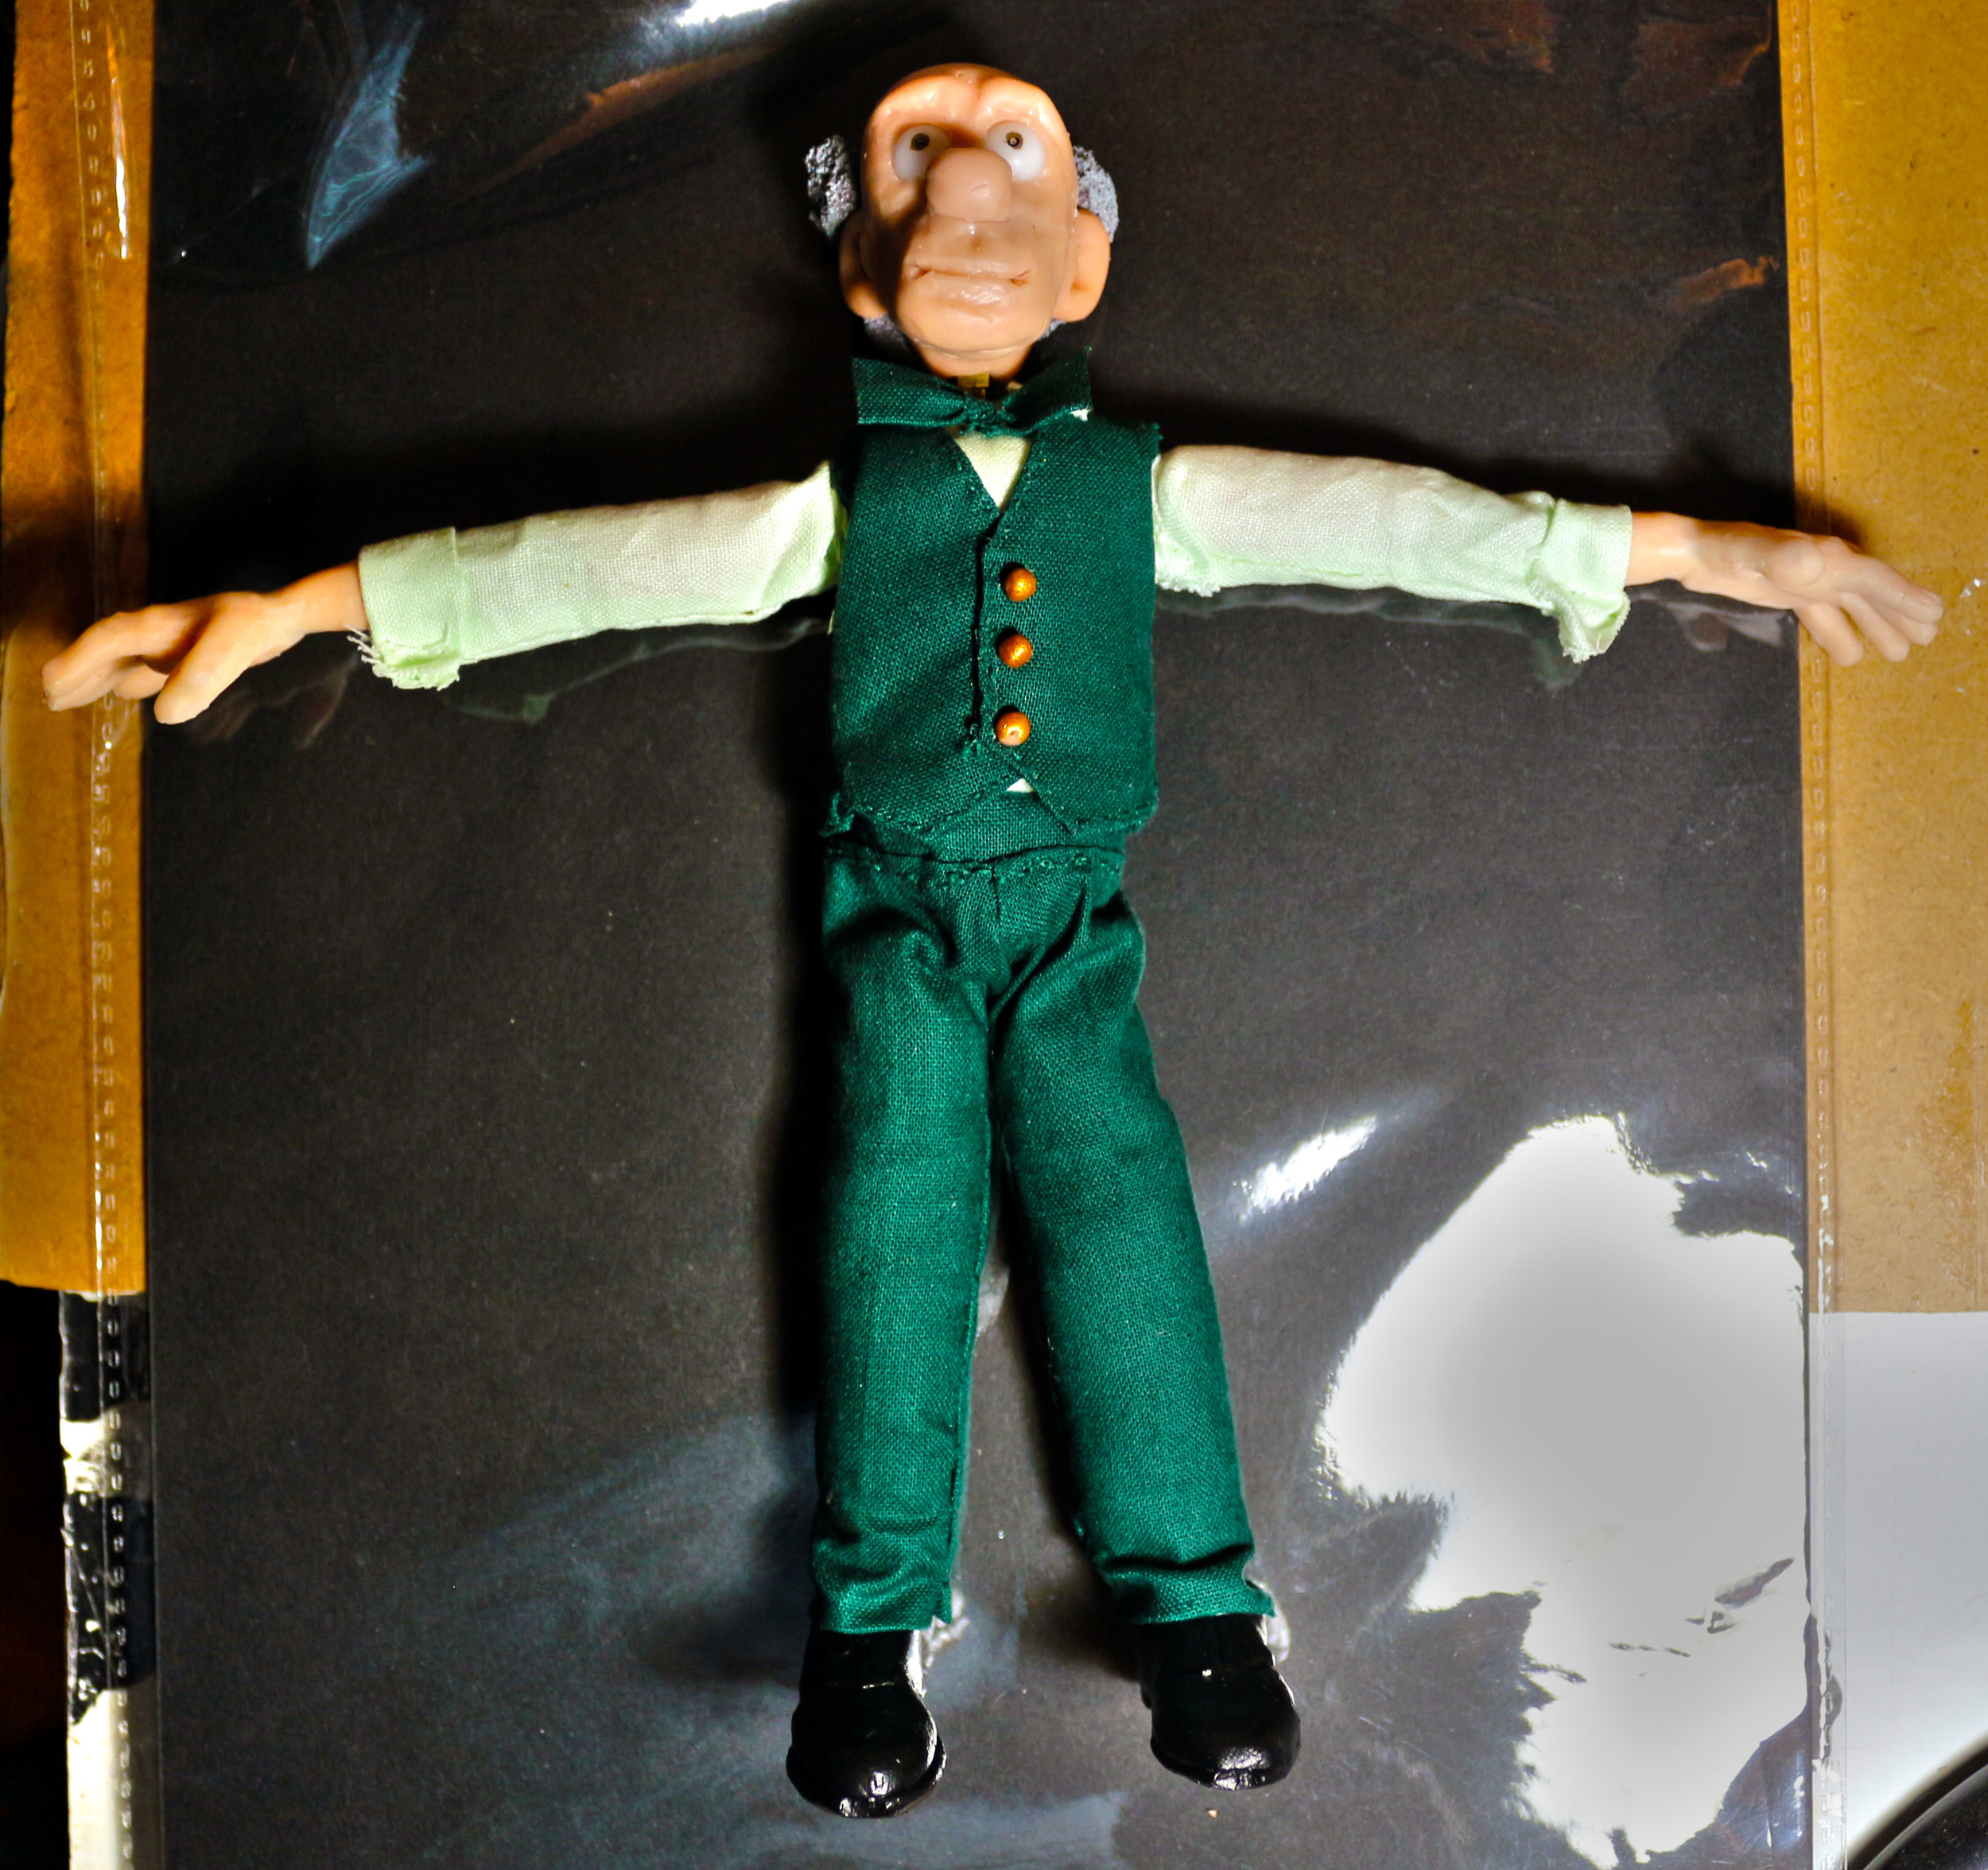
finished puppet
The set up for the shoot was a little tricky. Firstly, there are 2 cameras to think about. One for the shot and one to simulate a mirror. I needed to drill holes in the floor of the elevator for the tie-downs to come through (as well as the wire to rig the hat when he throws it). The lighting could only come from the roof so shadows weren't cast on the blue screen. However this meant that the bottom half of the scene was quite dark.

1. the set up 2. tie down access
Simulating a mirror was something I've always wanted to try. To me it's such a great trick that should help immerse the audience in the location and hopefully - if all goes to plan - will go completely unnoticed.
So to make it work, I took both removable walls off and lined the cameras up in Dragonframe using the centre cross. I also ran a piece of string between the lenses but I'm not sure that actually helped or was necessary.
Another thing to consider is both cameras need to be equal distance from the "mirror" not the elevator itself, which was an early mistake I made.
I then took a photo on both cameras with the respective walls in place, lined them up in photoshop to check it worked, then I was ready to animate.
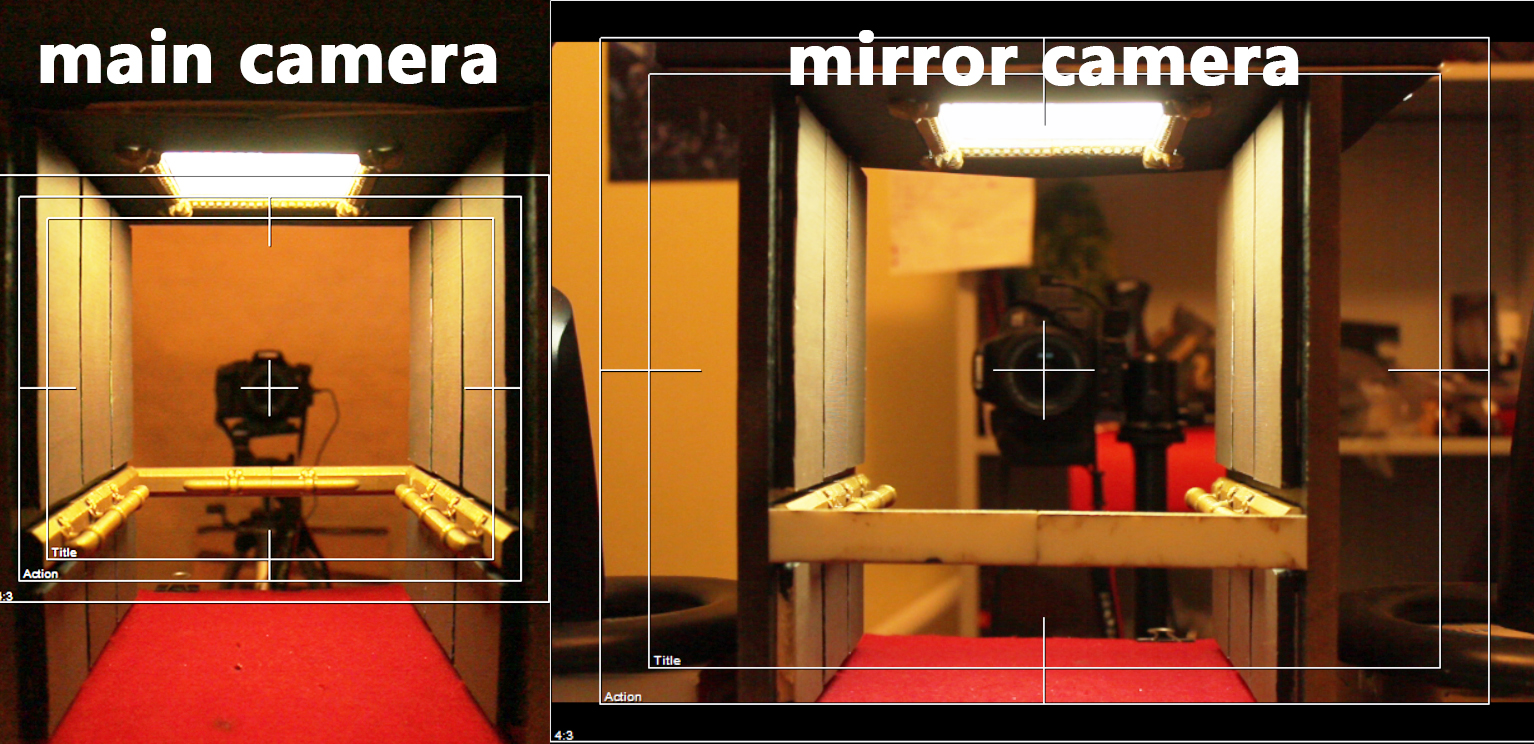
camera line up
The unique thing about animating this project was every time I took a photo in dragonframe, I needed to remove a wall, attach the opposite wall and then take a photo on the second camera using EOS utility (or a remote, but I didn't have one). So next time I animate I'll be relieved that I don't have to do that anymore.

In post-production I keyed out the blue screen and slightly blurred the mirror footage. I removed the wire holding the hat in mid air. I added the light flickering on and then off. And lastly I put a motion blur effect on the character to give it a bit of extra realism. I found the music at bensound.com called "the elevator bossa nova". If I'm honest this track sparked my interest in making the film in the first place. Below is the final film:
Behind the Scenes - Bush Turkeys of QCA
This project was a uni assignment for the "Alternative Animation Techniques Course" at Griffith University. The client was the Griffith Film School. The Brief was to create a 15-30 second "signal film" (or logo sequence) to play before Griffith live action films when they go off to festivals.
I pitched the idea of a bunch of turkeys stealing food from a QCA student. Which is a common occurrence around South Bank here in Brissy. So it seemed appropriate to play off that and turn it into a heist slash jurassic park inspired comedy.

Bush Turkeys of QCA - Still
My main concern for this film was the deadline which was about 4 or 5 weeks away. So I was looking around for interesting ways to cut corners. I came across a product called "Bake and Bend Sculpey" which in theory should've be a quick way to make the turkey without moulds and silicone. I tried it a few times and it kept cracking when I bent it. Even with shorter baking times I still was unable to achieve the bendability required. So to fix the problem for this film I covered the cracks with plasticine.

1. turkey parts made from bake and bend sculpey. 2. Early mock-up of the turkey 3. Bake and Bend Sculpey
For the main character I made a simple wire armature with detachable arms for convenience. I also added a rigging point at the hips because the feet don't have tie downs. The silicone hands I took off an old puppet to save time (and recycle).
armature diagram
3D printing is a fantastic way to speed up set/prop building. The printer can make things while you're making something else. It's like having you're own assistant. I find the printer good for geometric stuff that's difficult to sculpt by hand. For example the chairs, I modeled in Maya and printed 6 of them. Each chair used 20.3g of ABS (which costs about $2), taking just over an hour to print (on the UP mini 3D printer).

1. 3D printed chairs, unpainted. 2. Early layout with the finished painted chairs and tables.
With only a week left, I finally started animating. I animated on 2's and 3's without any drafts or blocking. Which is unfortunate, but that was the only way I could get it done with time to edit and render etc.

1. Motion Control Rig. 2. The set. 3. Birds eye turkey rigged up.
Post-production took longer than expected. I had green screens to key out, rigs to remove, multiple turkeys to comp in, along with colour enhancements and so on. This is one of my favorite parts of the process, where everything comes together like magic. Below is the final film: